|
Due to the nature and speed of the manufacturing processes that intervene in the creation of parts for shafts, the results are usually very aggressive with the final aesthetics of the product
and very tolerant with the defects allowed on its surface, that is, it is common for them to have a visual defects that must be corrected in a pre-machining process and even the part must
undergo geometric corrections due to mechanical deformation before receiving the precision machining service.

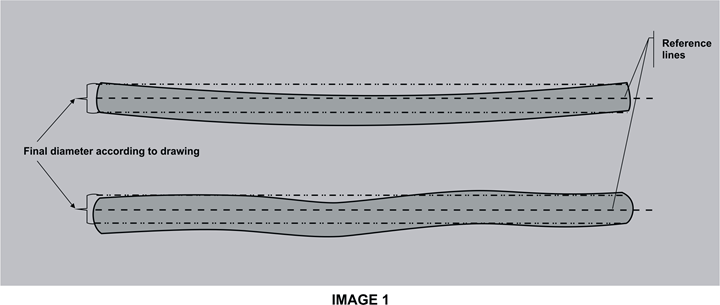
Let us pay attention, for example, to the defects that the shafts usually present in their length. Sometimes they show bending defects because they were manufactured at high speeds or
carelessly transported to their destination before final machining. Some of the most common defects are presented in image 1.

We can perceive that there are deformations or curves that move the center of the axis diameter away from a marked reference line, it is this same line that marks the turning center of the
lathe and if you try to machine the piece without correcting the deformations, there is a risk of irreparably damaging the product, thus wasting man-hours and material in inefficient work
that definitely should not be accepted by the customer.
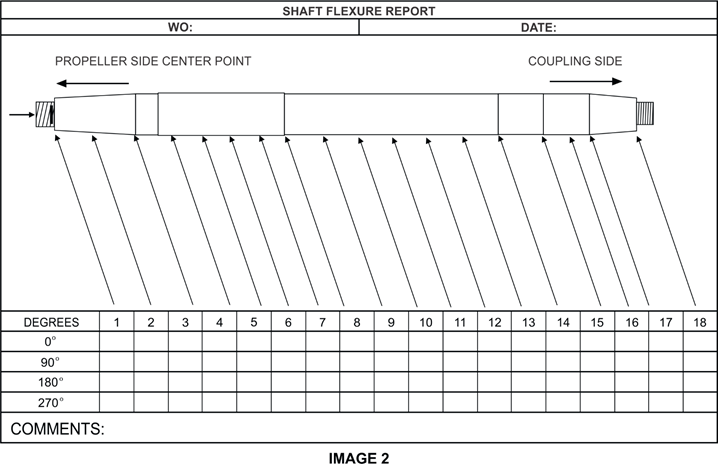
At Rice Foundries we established a preparation method for shaft rectification, or shaft straightening as it is colloquially known, based on the measurement of cardinal points along the shaft
that allow us to qualify the severity of the defects. This information is compiled in a report similar to the one in image 2, which will be used during the geometric correction as a reference
and for the qualification of progress.

Material specification data, elongation and toughness points, and stress calculations in simulation software are used to judge whether the part can accept the geometric correction. Once this
judgment is released, the operator in charge of the process begins to apply calculated pressure on the points to correct the deformations one by one and along the part.
We are committed to customer satisfaction, which includes shaft straightening service on some repairs and on all of our new part machining.

|